Process
- Pencilled in non-photo blue on bristol comic book art board.
- Inked with Copic liner, 0.3 (used 1.0 for the fills).
- Scanned at 300 dpi.
- adjusted levels in PhotoShop to delete non-photo blue; set ink layer to multiply.
- colored on a layer below, using colors from limited palette. Three layers: background, thorn bush, characters.
- leterred; free-hand painted word bubbles; used Stamp filter to smooth bubbles.
- created rounded rectangle paths on vector mask layer to create panel borders; set layer effects to stroke paths and fill gutters with white.
What I learned
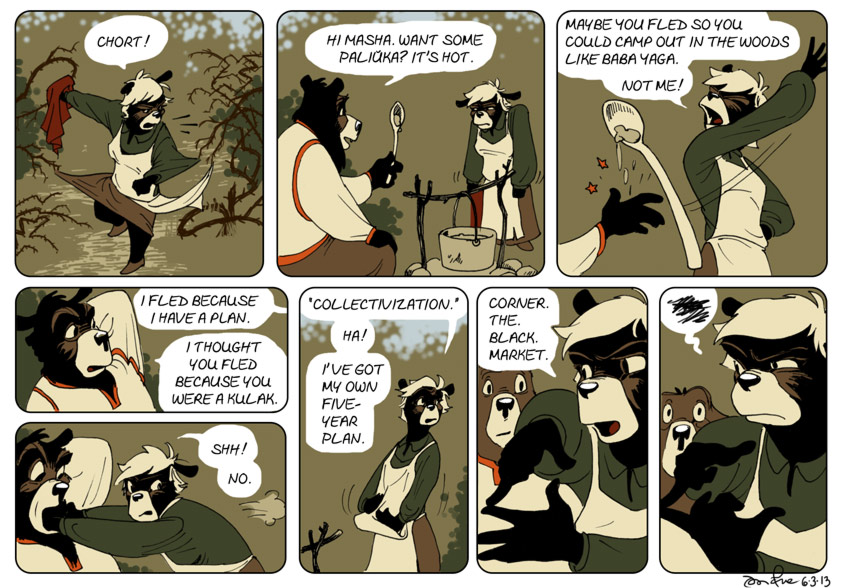
In terms of the traditional inking, I think I’ve learned that I can work slightly faster if I loosen up. I can easily clean up the inks in PhotoShop later. But more importantly, inking more quickly and loosely by hand is starting to allow me to get more expressive with my line work, here and there. I’m pretty happy with panel 3, for instance; even though Masha’s clothing is not defined by many lines, it is defined satisfactorily by a few lines in the right places.
And also I was kind of dumb using my Copics to fill the areas of black when I can do that with the paint bucket tool in PhotoShop.
In terms of character design, I’m seeing I have a ways to go. Masha, like Szpadel the deer, Lucky the Boar, and others, is a new design I’ve only been working with for a few weeks. Her facial expressions are hard for me to control because I just haven’t drawn her that many times. Malutki I’ve been drawing and refining for two years; he emotes much more clearly in this strip. Ah well; practice, practice, practice is what this webcomic is all about.
I’m excited about the potential for using vector mask layers in Photoshop to define the panel boundaries. I got this idea after watching my friend Tiff work on a website wireframe. Once I figured out how to draw the rounded rectangles on the setting where they are “holes” in the layer mask, it was actually pretty easy. And telling the layer to automatically stroke the paths, as a layer effect, is awesome. I can adjust the line-weight of all the paths at once, for instance. Now I’m thinking about how I might be able to use a paths on a mask layer for word bubbles, and if there’s any benefit to doing so. Anyone have experience with that, and care to comment?
Leave a Reply